SwitchyOmega
How to set up GaGaNode proxy on the SwitchyOmega browser extension
SwitchyOmega proxy setup guidelines for Chrome and Firefox extensions.
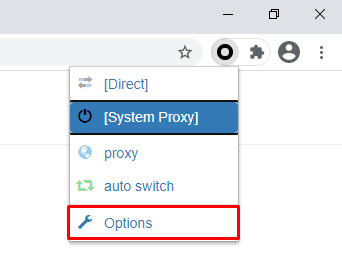
- Click on the SwitchyOmega icon in your browser, and open Options.
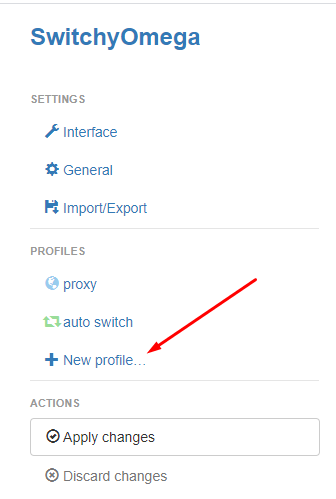
- Click on the New profile button in the PROFILES tab.
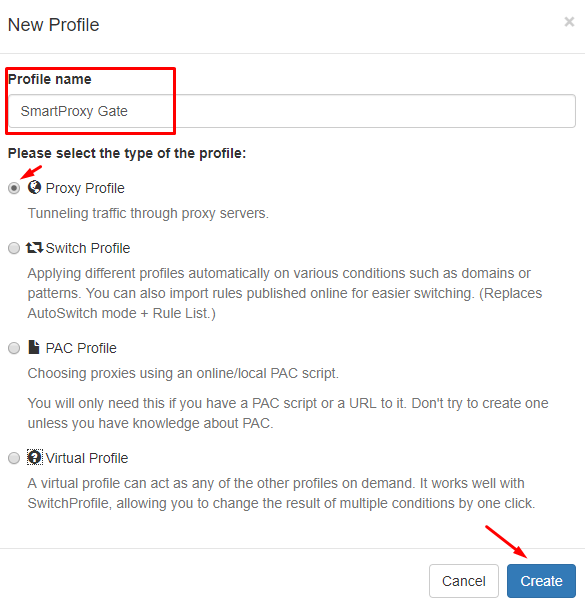
- Write down the name you prefer in the pop-up window under Profile name. Select the Proxy Profile option. Then, click the Create button.
- Select HTTP in the generated table. You can find it under the Protocol column.
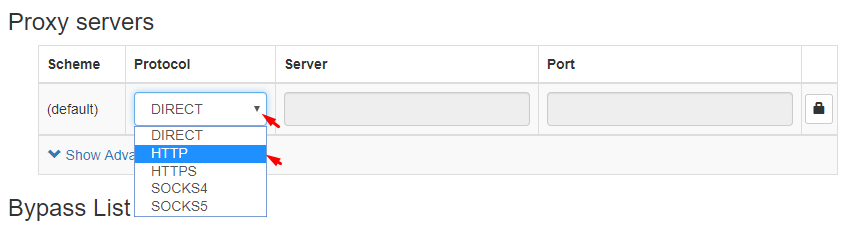
- Type in your preferred endpoint details in the Server and Port columns. If you are using a Whitelisted IP feature, skip to Step 7 of this tutorial. If not, click on the lock icon.

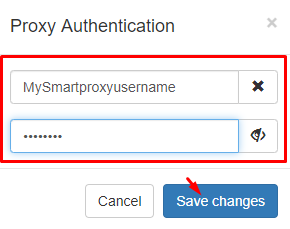
- Type in your Username and Password. Then, click the Save changes button in the pop-up field.
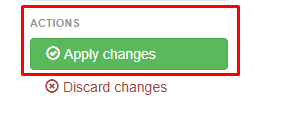
- Click on the Apply changes button to apply settings and create a profile for your proxy. You can find this under Actions.
- The profile you created will now appear in the proxy list when you access SwitchyOmega through the extension icon.
FoxyProxy
First you will need to download and install the FoxyProxy extension For Chrome or For Firefox.
Setup for Chrome
- Click on Options.
- Click on Add New Proxy in the proxies menu.
- Choose Manual Proxy Configuration.Enter our gateway’s Host or IP Address and Port (e.g. gate.smartproxy.com:7000 for random IP). Then, click Save.
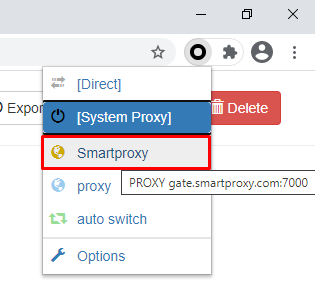
- Go to Proxy mode and select the Smartproxy proxy from the drop-down menu.
- To see if the proxy is working, check your IP on https://www.iplocation.net/.
Setup for Firefox
- Click on Options.
- Select Add.
- Select either Proxy Type HTTP or SSL (HTTPS), enter the Proxy IP address or DNS name, Port, Username and Password. Then, click Save.
- Go to Proxy mode and select the Smartproxy proxy from the drop-down menu.
- To see if the proxy is working, check the IP on https://www.iplocation.net/.